The Project
Good project to use as a positive/ negative space study.
This is from one of my FAVORITE blogs: visit here

As you can see from the picture, this project will have you scratching part of the design on the scratch board (negative) and tracing the design with a black marker in the white boarder (positive).
Further into this post, there will be more pictures, but you can always draw your own design...just size it to fit the larger sheet of paper (read on, you'll see).
Now for the scratchboard...
Yes, some things are true on Pinterest, and some things are not. With some projects, you have to find out a better way to get it to work. Some things...forget about it!
But, through trial and error, I found a half-way decent recipe for making your own scratchboard. Don't worry, I have information where one can purchase them if you have NO desire to go this route.
For the scratchboards, I searched high and low, locally, and only found two different kinds of kits. One with four small boards that had patterned or rainbow backgrounds and the others were large with metallic backgrounds. Neither worked for me as I wanted a solid white background to match the white boarder of the project and I needed to stay within in a limited budget.
So, I made my own. After trial and error, I came to this recipe:
You should use a sturdy paper; I used finger painting paper because I thought it would "resist" the paint enough and it was dirt cheap...the first error. It did work after I coated it with wax, but it was "wavy" after painting and gluing.
The Recipe and Process
paper
black tempera paint
liquid dish soap
wax bars (I used canning wax)
foam brush
disposable cup
fine tipped black marker
toothpick or scratching tool
newspaper (to cover surface when painting)
How to mix the paint
Mix about 1 cup of paint to 1 tsp. of liquid soap (or more)...in the cup...with the foam brush.
What to do with the paper
Cut the paper to the size you want. You will need two, one smaller than the other; to be used for the scratch board.
For each project, I used an 8.5 x 5.5 (card stock cut in half) and a smaller one for the scratch paper (about 7 x 4).
Using the smaller sized paper, coat them well with the wax. You could also use crayon, but since I was preparing for a class, coloring 20 sheets of paper was not time effective...the wax blocks worked great (find them in the canning section of the store).

Cover the surface of the paper with a thick layer of the paint mixture and let it dry completely.

Glue it to the center of the larger sheet, careful not to scratch the surface.

Now the actual project
Center the design on the paper and tape the picture to the edge of the larger sheet. Use graphite paper to transfer the design...white for the black part, grey or black for the outer edge.

Use the toothpick for scratching or a scratching tool, which you can find at Mr. Art. Finish off with a fine tipped black marker to trace over the transfer marks that were made on the white edge/boarder.

NOTE: with the homemade scratchboard, it is best to make short scratches instead of long lines. Paint can peel off in larger pieces if you don't do short, small scratches.
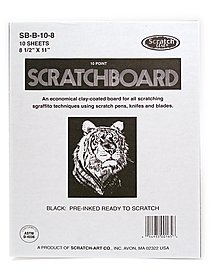
If you want to order the scratch boards...
You can find them at Mr. Art.
If the link doesn't work, please use the Mr. Art link to the top left. Type in "scratch boards" in their search.
Mr. Art link
You can find them at Mr. Art.
If the link doesn't work, please use the Mr. Art link to the top left. Type in "scratch boards" in their search.
Mr. Art link
You can also find scratching tools and other kits on this site.
The kits at Hobby Lobby were about $5 (one kit had four small boards, the other had one metallic one).
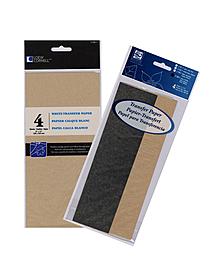
Again, if the link below doesn't get to Mr. Art, click the link to Mr. Art to the top left and search for "graphite paper grey and white".
Here are some patterns that you can resize to fit your project:


Please do not use these pictures for selling as I am not sure if they have a copy right.
Make sure that the picture goes out to the outer edge of the larger paper. This way part of the picture will be scratched and part of the picture will be traced onto the white with a black marker.
You can use different colors, especially if you are making your own scratch board. I suggest that the color of the background on the board will match the larger paper or the boarder color.
Happy scratching!
Mrs. Hayes
No comments:
Post a Comment